Connecting Data Cloud with MuleSoft

Introduction:
Data Cloud is used for unifying all your customer data and customer engagement data from any external systems, web, and Salesforce apps into a single source of truth. Elevating your customer relationships and customer engagements beyond mere numbers and making them feel truly understood. Data Cloud has built-in connectors that bring in data from any source, including Salesforce apps, AWS, Azure Data Services, Google storage, mobile, web, connected devices, and even legacy systems with MuleSoft and historical data from proprietary data lakes, in real-time.
For example, In Salesforce Commerce Cloud it can be used for empowering every retailer to craft personalized shopper experiences that dynamically respond to real-time customer actions, such as abandoned shopping carts or interactions on websites and mobile apps.
Anyone new to Data Cloud here are some links you can learn about it.
https://trailhead.salesforce.com/content/learn/modules/salesforce-genie-quick-look
https://www.linkedin.com/posts/nexgen-architects_crm-aws-google-activity-7150790340122136576-cTd8
Initial setup:
Through the Ingestion API, which offers a RESTful interface it’s possible to transmit data from an external system to Data Cloud. The integration of your Data Cloud instance with external systems is streamlined by MuleSoft and its pre-built connectors.
To ingest data from MuleSoft to Data Cloud, we need to create a Connected App. To initiate the process of sending data into Data Cloud using the Ingestion API through Mulesoft’s Salesforce CDP Connector, it is essential to configure a Connected App. This is crucial for establishing the necessary connection to facilitate the seamless flow of data between the two platforms. We need to extract the Consumer key and Consumer secret for the MuleSoft Connection. Save Consumer Key & Consumer Secret.
To know more about how to create and configure a connected app refer to the links below, this includes
https://help.salesforce.com/s/articleView?id=sf.connected_app_create.htm&type=5
- Create a Connected App
- Configure Basic Connected App Settings
- Enable OAuth Settings for API Integration. Select OAuth Scopes as required
- Configure a Connected App for the OAuth 2.0 Client Credentials Flow
To generate Consumer Key & Consumer Secret follow the link below
https://help.salesforce.com/s/articleView?id=sf.connected_app_rotate_consumer_details.htm&type=5
To learn more about connected apps refer to this link
https://help.salesforce.com/s/articleView?id=sf.connected_app_overview.htm&type=5
Once the Connected App is created, the next step is to enable the OAuth Username and Password Setting. Follow these steps:
- Navigate to Setup > OAuth & OpenId Connect Settings.
- Enable the “Allow OAuth Username-Password Flows” option.
- Confirm the changes
Set Up Ingestion API Connector
Set up an Ingestion API connector source to fetch data from external sources.
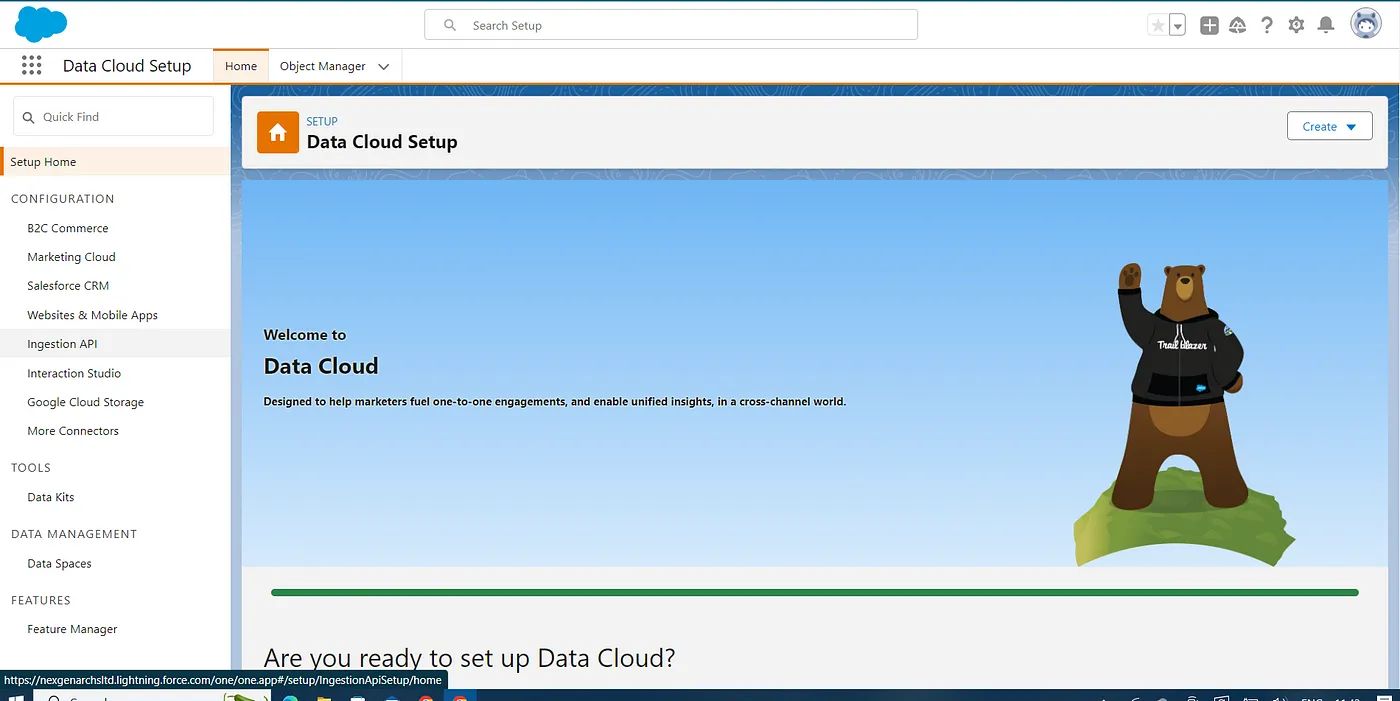
- Select Ingestion API and click “New”
https://help.salesforce.com/s/articleView?id=sf.c360_a_connect_an_ingestion_source.htm&type=5
- We need to upload the schema file to specify what data needs to be ingested by Data Cloud. For reference of schema file check this out.
https://help.salesforce.com/s/articleView?id=sf.c360_a_ingestion_api_schema_req.htm&type=5

https://help.salesforce.com/s/articleView?id=sf.c360_a_ingestion_api_schema_req.htm&type=5
To ingest data into Data Cloud via the Ingestion API, you need to create a Data Stream.
Follow these steps:
- After creating an Ingestion API, go to the Data Cloud App.
To navigate to the Data Streams click on App Launcher and search for Data Cloud.
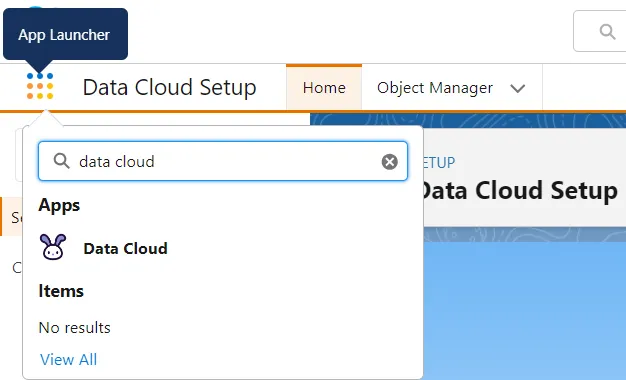
- Select the “Data Streams” tab.
- Click on “New” to initiate the creation of a new Data Stream.

- From the available options, choose “Ingestion API” under the “Connected Sources” section for Data Streams.
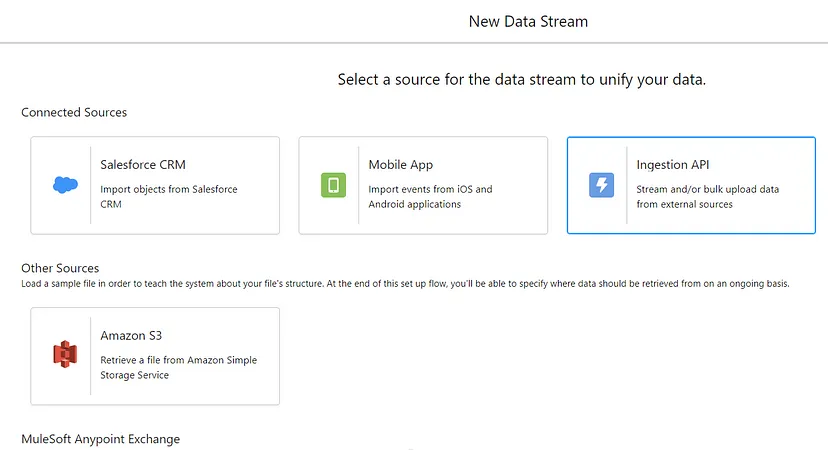
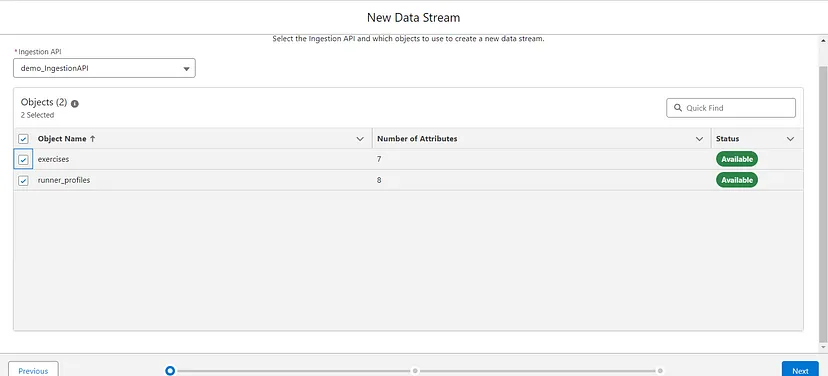
These steps will allow you to set up a Data Stream that utilizes the Ingestion API as the source for bringing data into your Data Cloud instance.
- Select the specific Ingestion API you created earlier, and click on “Next.”
- Provide the following details:
- Category
- Primary Key
- Record Modified Field (ensure it is a date-time type of field)
- Click “Next” to proceed with configuring additional settings for the Data Stream.
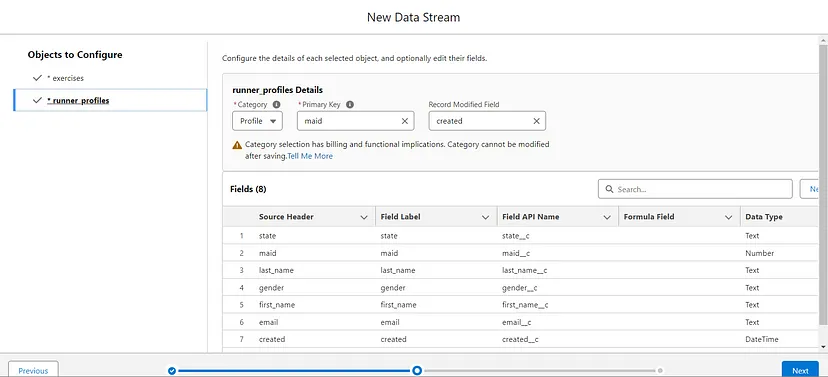
- Select the appropriate Data Space for your Data Stream.
- Define any necessary filters based on your requirements.
- Click “Deploy” to create the Data Stream in Data Cloud.
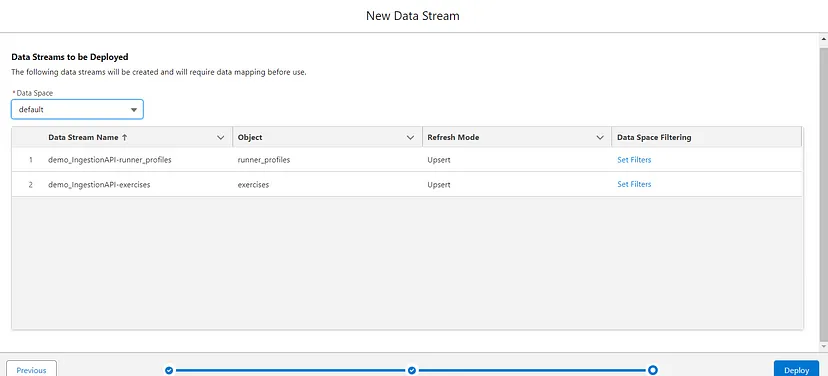

Now, the Data Stream is created.
Configure Data Cloud Connector:
To build a Mule app to ingest data into Data Cloud, follow these steps:
- Open Anypoint Studio and create a new Mule project.
2. Include the “Data Cloud Connector” in your Mule project this can be found in Anypoint Exchange.
- This connector is essential for establishing a connection between your Mule app and the Data Cloud.
3. Within your Mule project, set up a new connection for the global elements.
- This connection will serve as the bridge between your Mule app and the Data Cloud.
4. Provide all necessary information for the connection setup. This may include credentials, authentication details, and any other parameters required for connecting to the Data Cloud.
5. Enter the specified URL, https://login.salesforce.com, as part of the configuration for the Data Cloud Connector. This ensures that your Mule app communicates with the correct Salesforce instance.
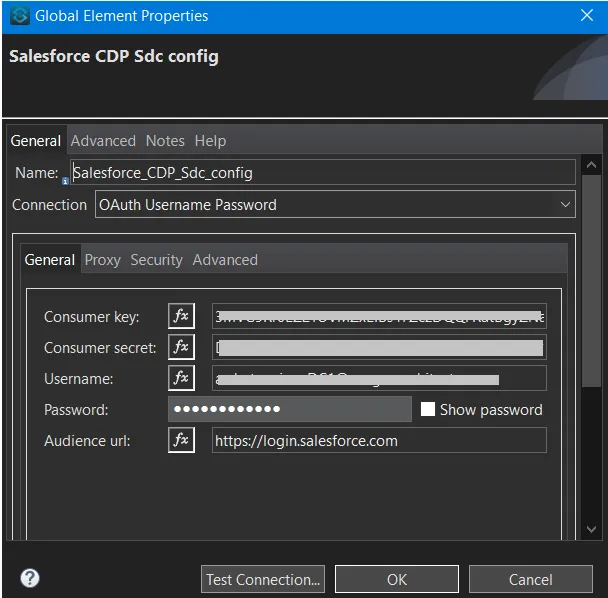
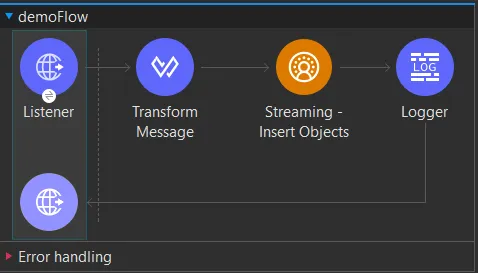
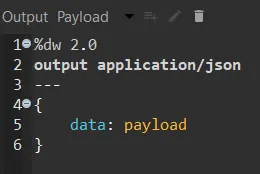
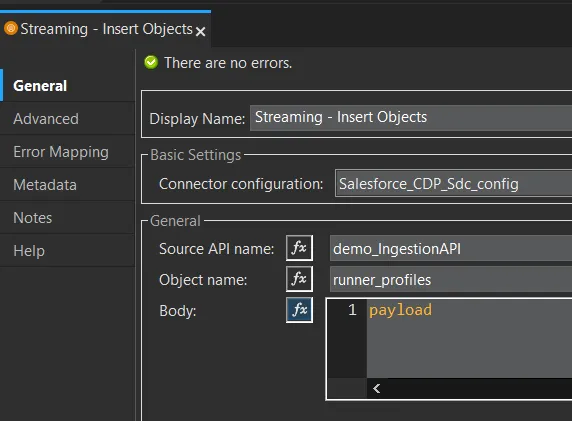
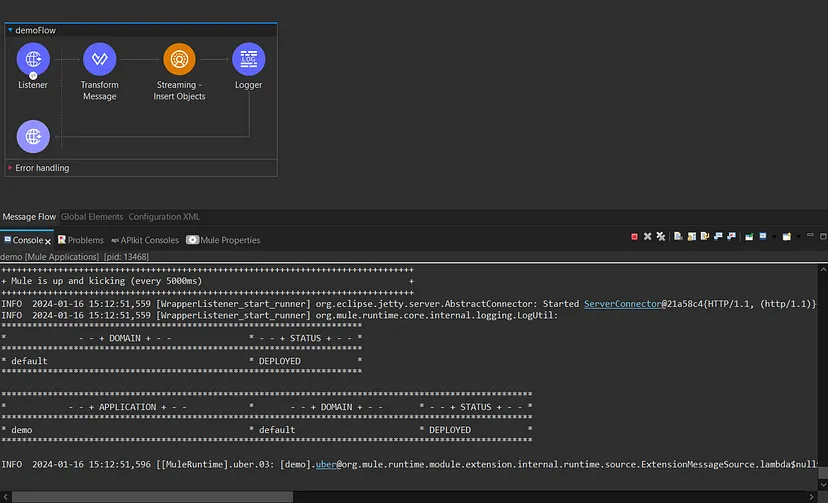
Here we are using Postman to send a request to the HTTP listener in the Mule app and check the response for successful data ingestion, follow these steps:
- Run Your Mule App:
- Ensure that your Mule app with the HTTP listener runs in Anypoint Studio and is successfully deployed to a Mule runtime.
2. Get the HTTP Listener Endpoint:
- Identify the endpoint of the HTTP listener in your Mule app. This is the URL to which Postman will send the request.
3. Set Request Body:
- Your Mule app expects a request body, to provide the necessary JSON data in the body section of the request as per the schema file you uploaded.
4. Check Response:
- Examine the response received from the Mule app.
- If the response is
{“accepted”: true} it indicates that the data has been accepted and successfully ingested into the Data Cloud.
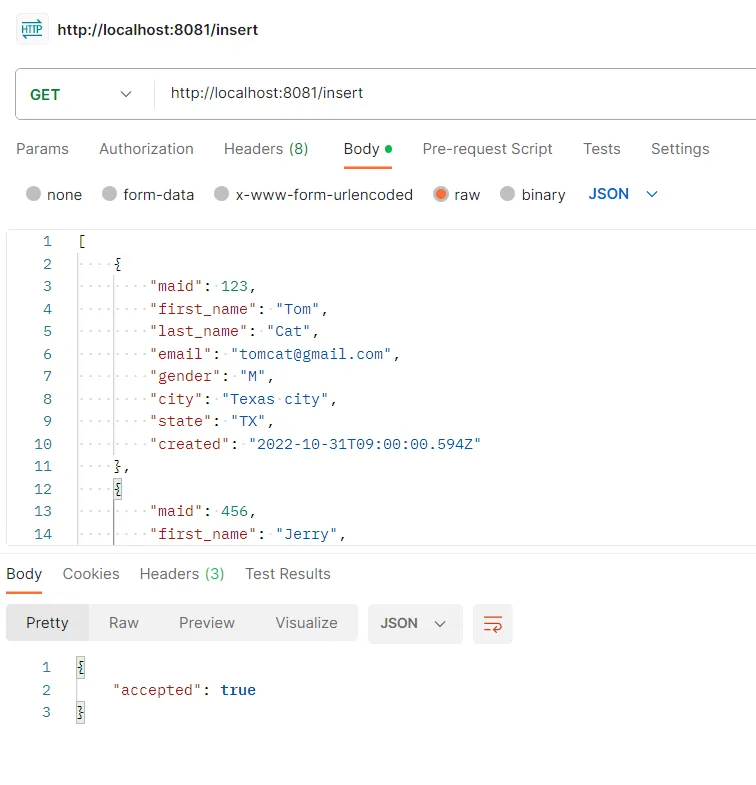
Now you can see the uploaded records in the Data Stream, Data Lake Object, and Data Explorer. In the Data Streams tab, the uploaded records take time to be reflected, try refreshing it.


https://www.linkedin.com/posts/nexgen-architects_crm-aws-google-activity-7150790340122136576-cTd8


.svg)

